
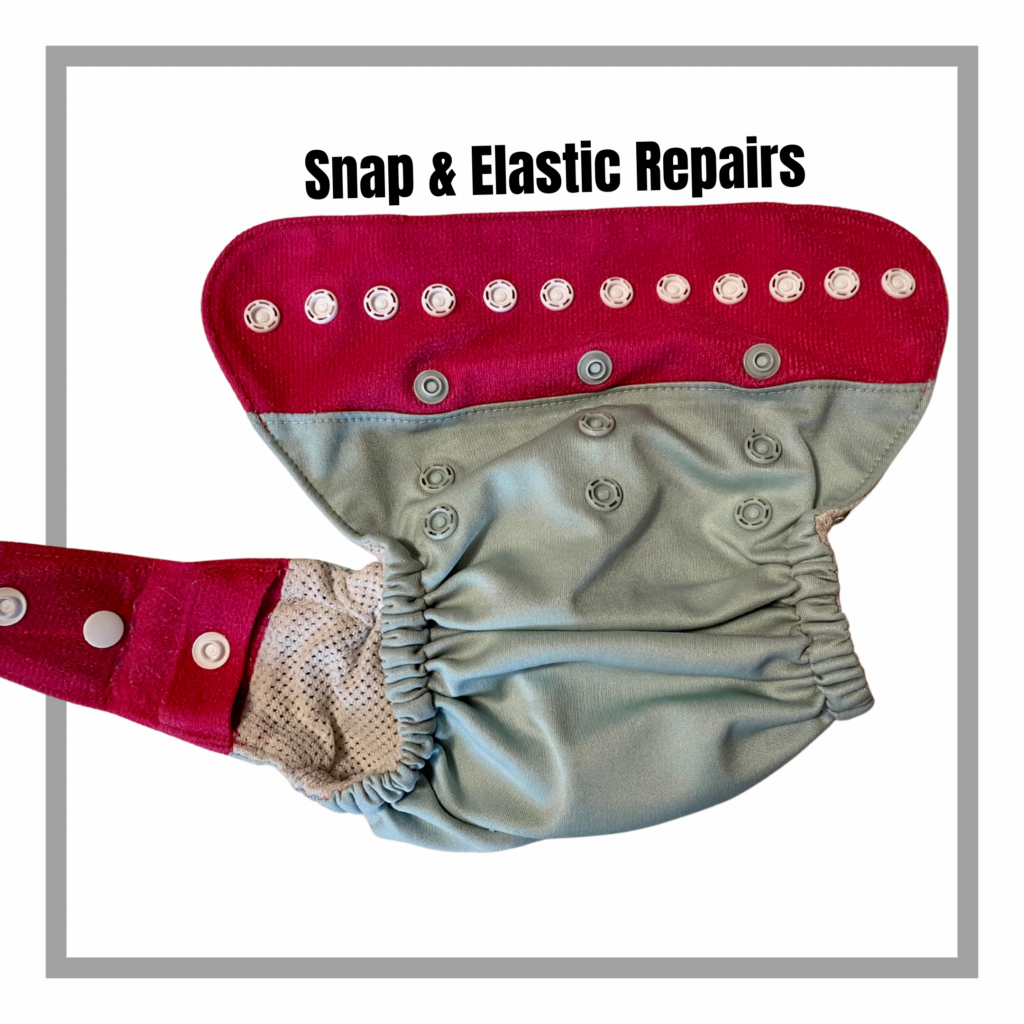
I have been repairing cloth diapers for a couple of years now. In my Etsy shop it is a service I provide. www.etsy.com/shop/homesteadingchicks One of the most often repaired brands I have seen is Grovia cloth diapers. They are thicker and hearty enough to last through several kids. The elastics and often the Velcro on them do not last forever. The tab Velcro cracks and the belly panel Velcro gets fuzzy. I would love to share how I fix this problem! I have done so much research and found matching snaps for Grovia cloth diapers. There are two ways to attach these snaps and it’s not hard at all! This post has links to my shop, my favorite vendor, and I am an Amazon Associate which means I may receive a small commission if you chose to purchase any of my favorite products on Amazon through these links to the items I own at no extra cost to you.
Choices of tools:
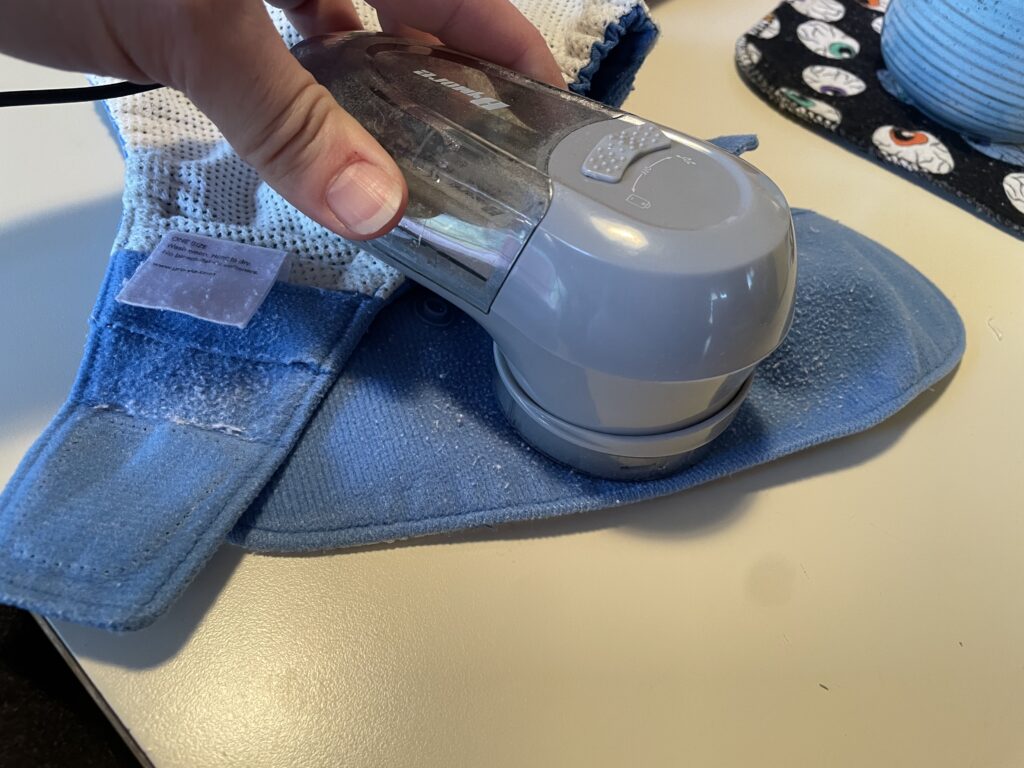
The tools needed are either a set of Kam snap pliers with wide cup and rod: https://amzn.to/3aTM4W Or a Kam snap press with Size 19 dies available at www.ilikebigbuttons.com They also sell the snaps made by Kam, which is the best quality and a known brand for quality snaps. I use a commercial press but this absolutely can be done with a hand set of pliers. You can use any seam ripper to remove the Velcro. My favorite seam ripper for removing the Velcro is sickle shaped: https://amzn.to/3MYqMnK I also like to remove the piling or fuzz on the front panel and tabs of the diapers. This sweater shaver uses batteries or a usb cord to power it: https://amzn.to/3tC8qT2 I have not had any problems with it removing too much or damaging the diapers.

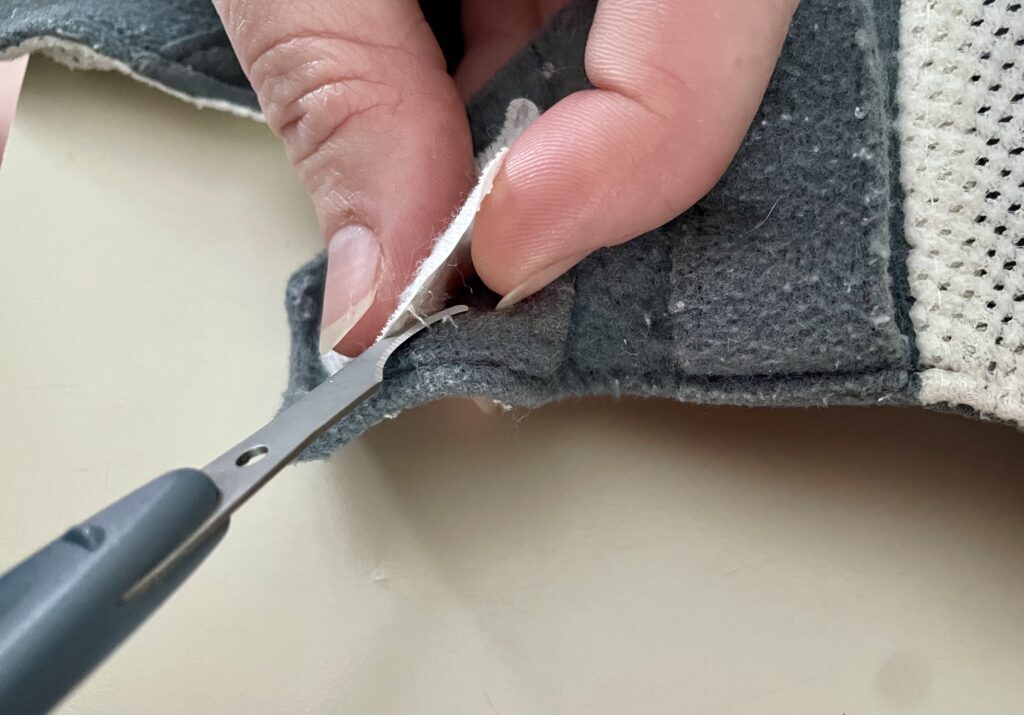
Removing Velcro
Start removing only the stitching holding the Velcro down at any loose spot. The objective is not to catch the outer layer of waterproofing and add any unnecessary holes. This step is not for in the car or with kiddos on your lap. Do not rip the loose Velcro off. Grovia is not kidding with how well they stitch down that stuff! Take your time and do it right. Remove the fuzz from the front before marking if you would like. This is a step that takes a lot of time but the results are so nice.
Adding Snaps From Outside The Diaper / No Stitching
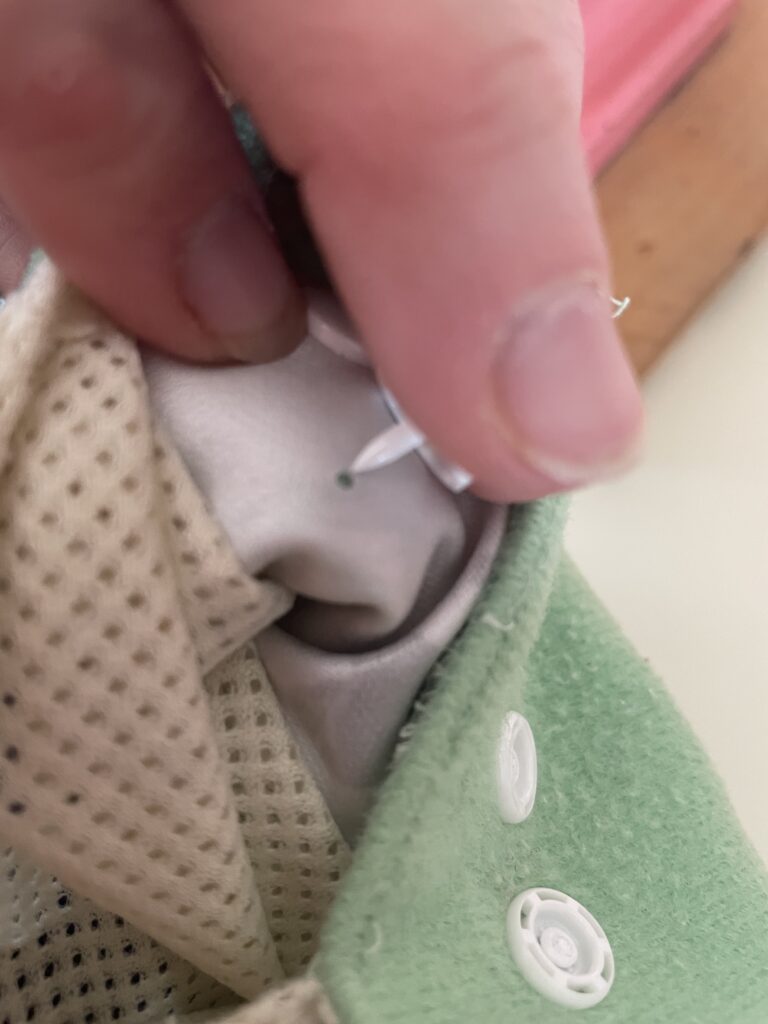
This is the fastest and easiest way to get to the finish line. Mark where you would like to have snaps. I use a dark colored ultra fine Sharpie to mark through the holes of my template. The template I developed replicates the pattern and spacing of originally snapped Grovia diapers. Ultimately your baby will not notice how many snaps you use or how far apart they are. You decide how to space them, it’s your project. To add the snaps you will put a pokey cap piece on the inside and load a female snap part into your pliers or press. Squeeze the pliers slowly and firmly to set the snap. The center of the snap will fill in when the pliers smoosh the cap center over. You will need to check that it works in the end. Occasionally I find a snap hasn’t been smooshed all the way down and will need another squish of the pliers to get it just right. Male snaps only go on the tabs facing inward or toward the tummy.

OR Adding Snaps From Inside The Diaper:
I often am replacing elastic and adding snaps to the same diaper. So I begin by opening up the front belly panel stitching. I made a template to line up my marks on the diaper. When I receive diapers from customers sometimes they have marks already on them that are not lined up straight. In the long run it doesn’t matter how perfect and straight the snaps end up. I like to be uniform and as exact as I can be when people are entrusting me with their investment. I worked with a small business on Etsy to turn my paper template into a sturdy acrylic template that can be purchased in my Etsy shop. I also have tools and little packs of snaps for this project. My snaps and tools are all from www.Ilikebigbuttons.com, I have never found them anywhere else. In case you skipped over the last bit, I explained how to use the pliers. I put the cap piece inside the diaper against the PUL waterproof layer. The wicking layer of fabric that goes against the baby when the diaper is worn will rest against the back of my hand or be pulled a bit out of the way while I’m snapping this way. female snap parts go on the outside fuzzy size of the diaper. Male snaps only belong on the tabs. After snaps and elastic are replaced you will stitch up the front panel to close. I have another post that goes into better details about elastic. https://homesteadingchicks.com/grovia-cloth-diaper-elastic-repair/
This project may seam intimidating. I currently charge $8 per diaper for snap work and $10 per diaper to do elastic replacement and snaps. I also have little packs of just enough snaps in my Etsy shop for DIY. I’m hoping this info will help my frugal customers, international customers, and anyone like me who just wants to try new things! Please feel free to ask questions and let me know if I can add anything!
Thanks again!
Thanks!
Thanks for the info! Interesting!
very good